Back to Instructions for filling the Examination Form
Saving draft and submitting
-
When filling out any form or document, it may have different statuses such as:
- Not Saved
- Draft
- Submitted
and possible actions for you to take:
- Save
- Submit
-
After filling all mandatory fields, you can “Save” the “Not Saved” document, allowing you to edit any number of fields multiple times until you choose to press the “Submit” button. Once the document is submitted, you won’t be able to make any further changes in it. If modifications are necessary, contact college authorities for assistance.
-
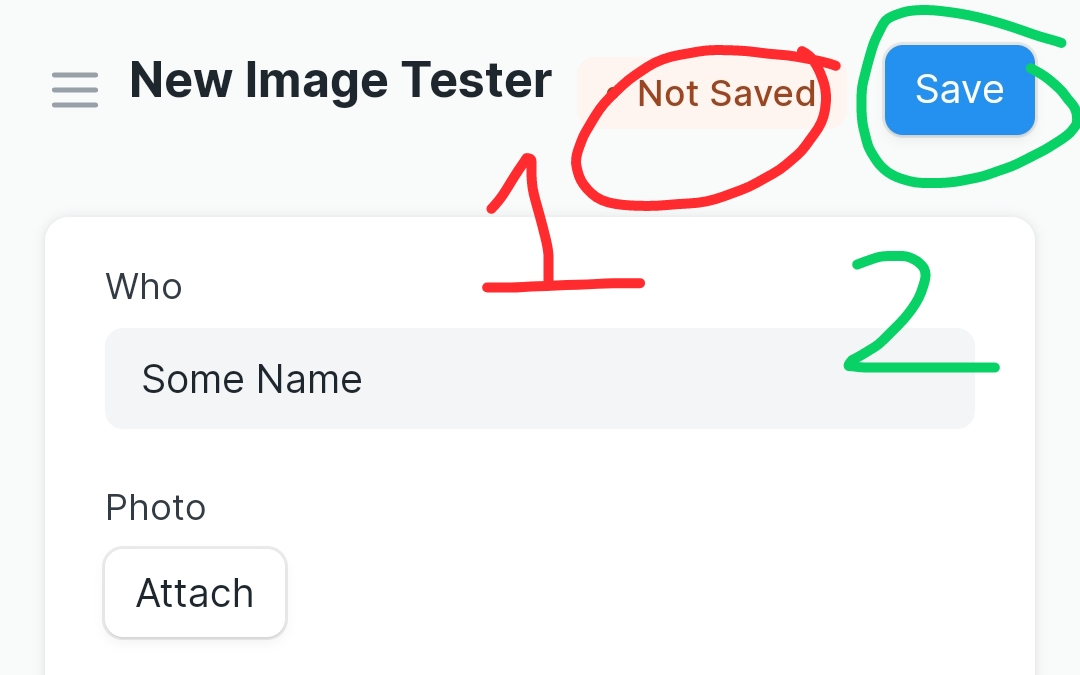
In the following image, document is “Not Saved” [red coloured]. Save it by clicking on blue [Save] button, marked as
2with green in the image below:
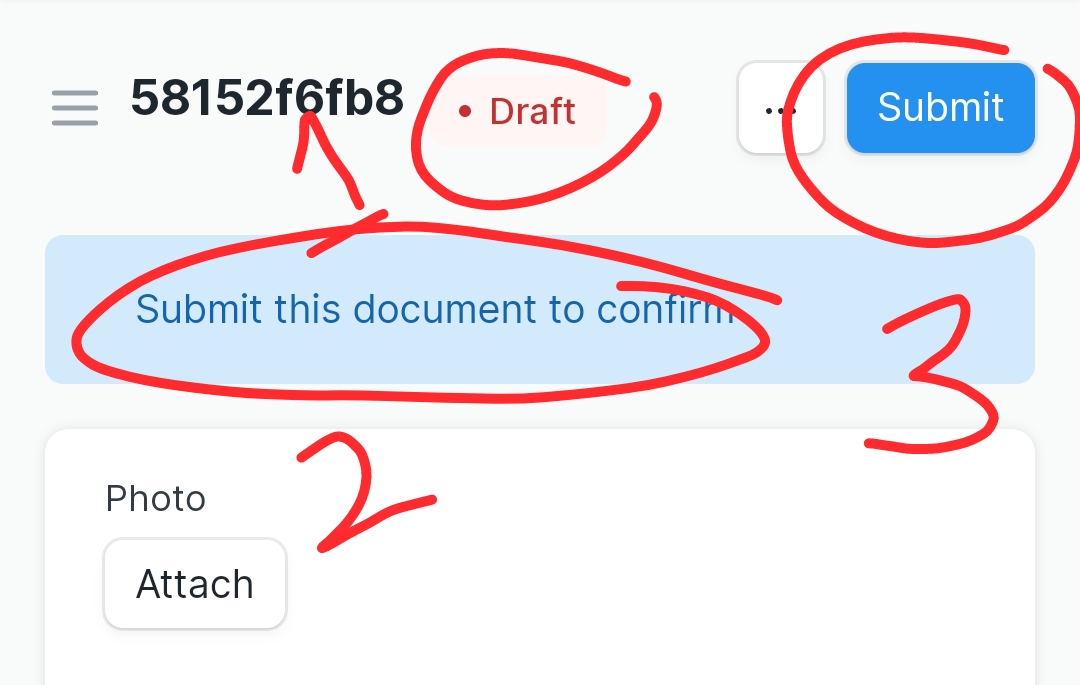
- While your document is in the “Draft” state, you can submit it by clicking the
3i.e. “Submit” button (as per instruction2), when you’re satisfied with all the entered data. Before finalizing, carefully double-check the information. While in the Draft state, feel free to edit and save the document as many times as needed before submitting.
-
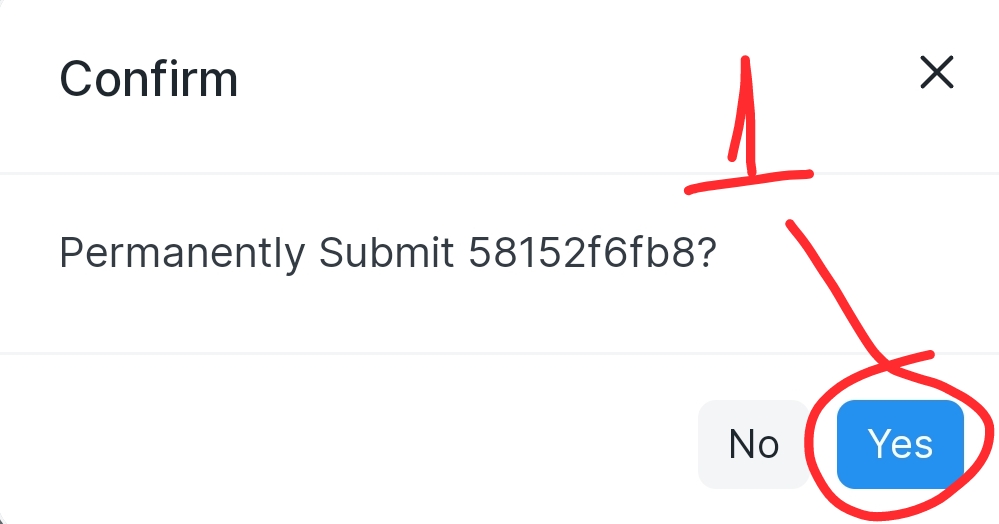
To submit permanently, click “Yes.”
-
The form is now in the “Submitted” state after submission.
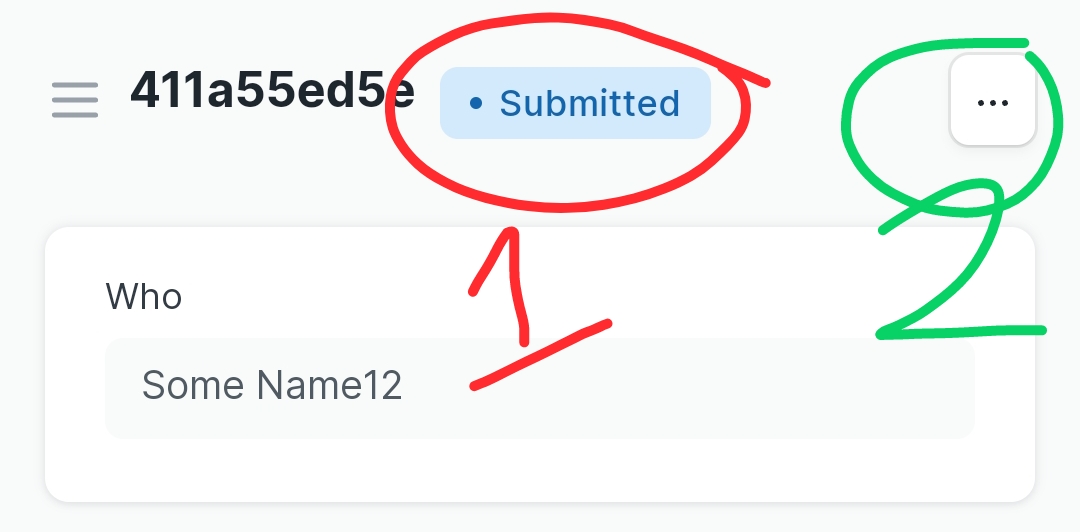
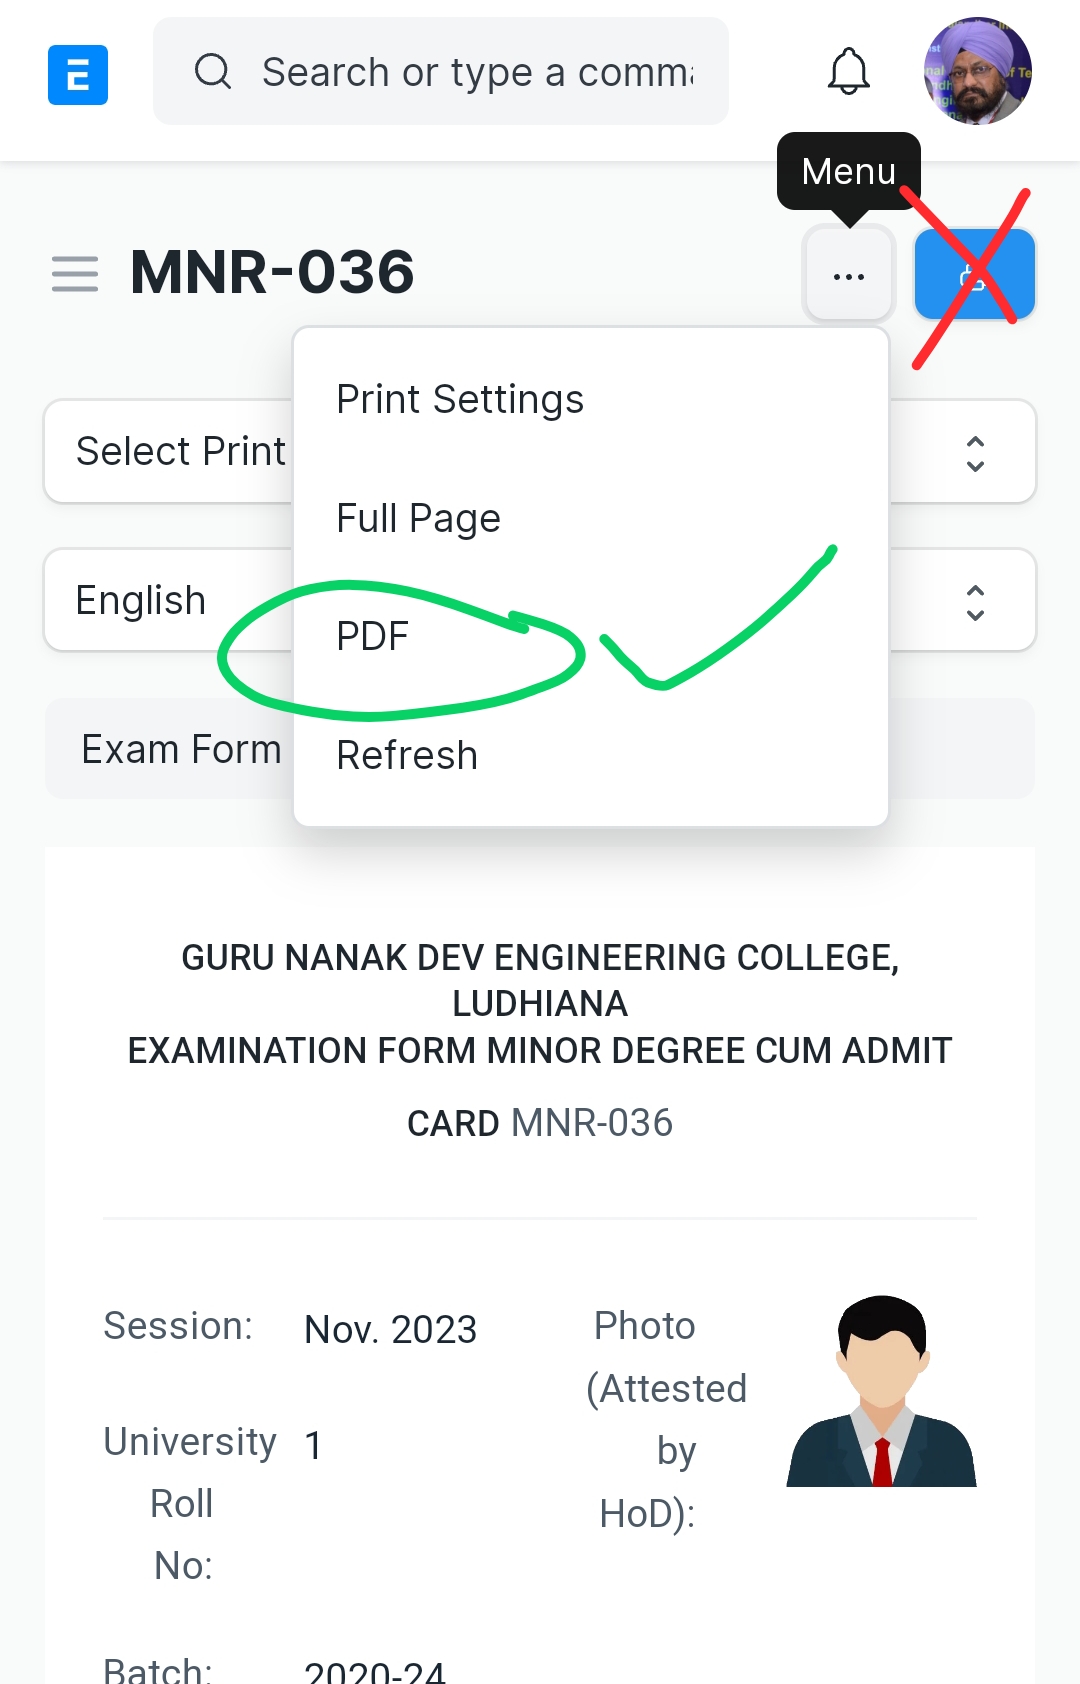
- After form is submitted.
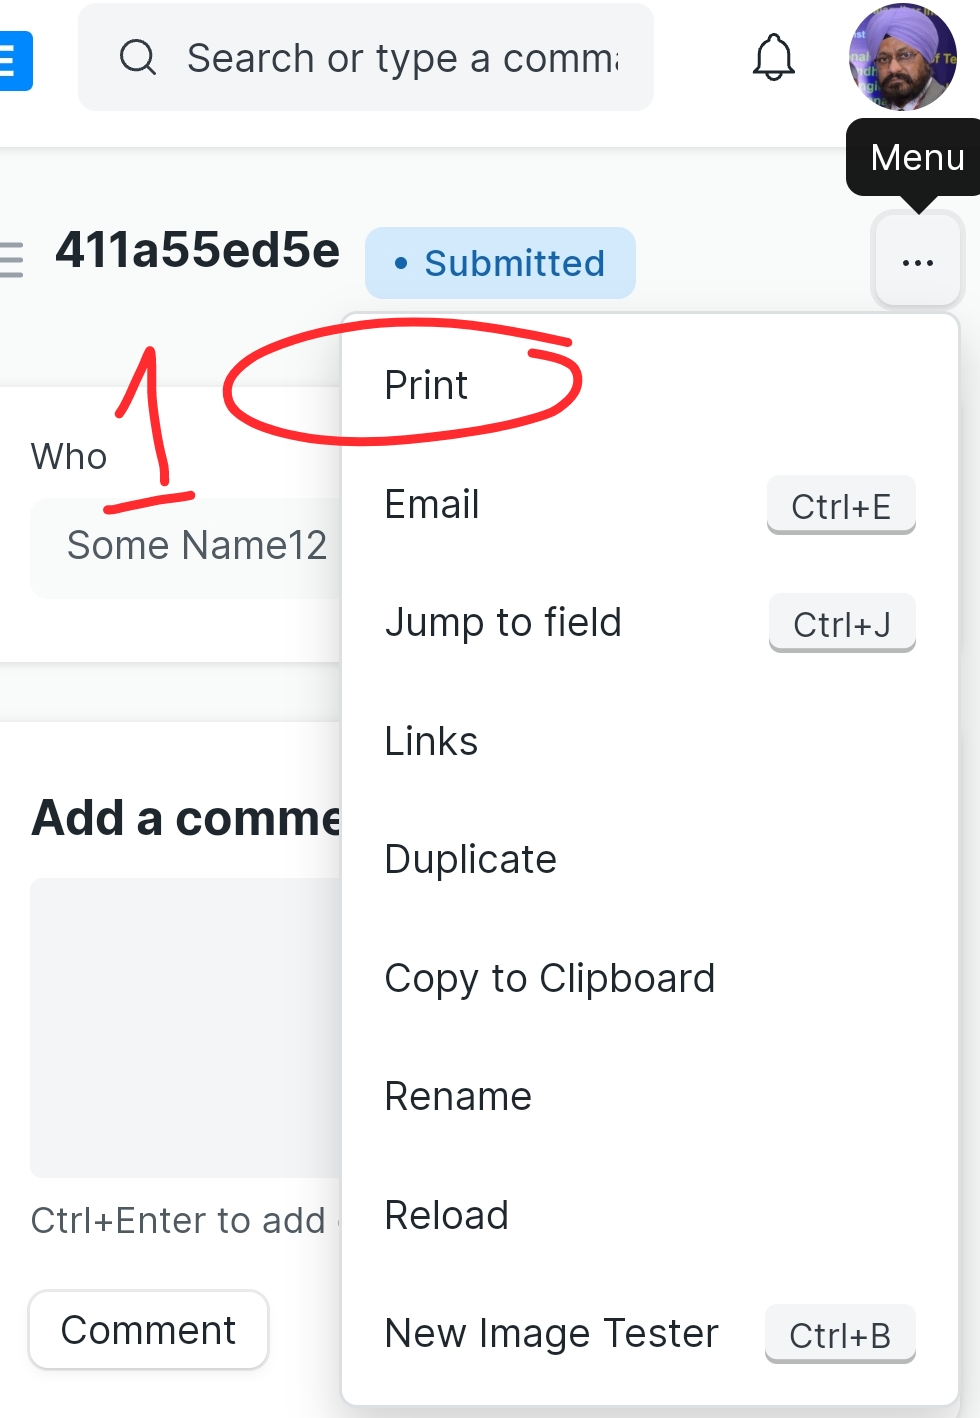
- Click on Menu/ellipsis (⋯).
- Click on Print.
- Click on Menu/ellipsis (⋯).
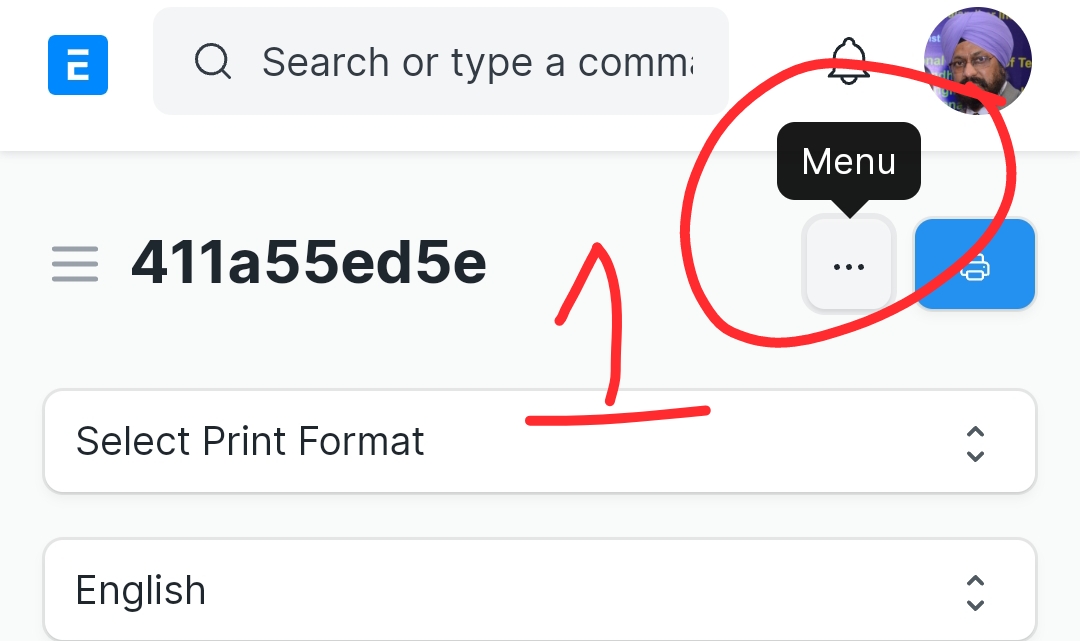
- Do not click “Print Icon” in blue colour.
- Instead click on PDF and Generate your form in Pdf (Green Colour).